Setting up your own local private AI is very easy and takes just a couple of minutes. It is done by downloading pre-trained AI models which can be run locally without any internet access. The benefit of this is that your AI models is contained within your own environment and no data is shared with any company. The downside of this however is that the performance will be limited by your own hardware, and the data that the AI model is trained on might not be the latest. You can browse a huge selection of open-source AI models and read about their details such as input/output, training data, etc.
Ollama is a tool that provides different Large Language Models (LLMs). It offers a CLI tool as well as a Python- and JavaScript library.
Ollama systemd service & CLI
It can be installed from the Ollama website:
curl -fsSL https://ollama.com/install.sh | shNote that the installation will let you know if a GPU is detected. This will make the AI models much faster at responding. It is however possible to use the models without a GPU, it just won’t be as fast.
List available commands:
$ ollama --help
Large language model runner

Usage:
  ollama [flags]
  ollama [command]

Available Commands:
  serve       Start ollama
  create      Create a model from a Modelfile
  show        Show information for a model
  run         Run a model
  pull        Pull a model from a registry
  push        Push a model to a registry
  list        List models
  cp          Copy a model
  rm          Remove a model
  help        Help about any command

Flags:
  -h, --help      help for ollama
  -v, --version   Show version information

Use "ollama [command] --help" for more information about a command.
The LLMs it provides includes llama2, codellama, mistral, and many more. A list of all the available models can be found on the Ollama website. These models can be downloaded and interacted with using the Ollama CLI, see below.
Download the llama2 model:
$ ollama pull llama2
pulling manifest
pulling 8934d96d3f08... 100% ▕████████████████▏ 3.8 GB
pulling 8c17c2ebb0ea... 100% ▕████████████████▏ 7.0 KB
pulling 7c23fb36d801... 100% ▕████████████████▏ 4.8 KB
pulling 2e0493f67d0c... 100% ▕████████████████▏   59 B
pulling fa304d675061... 100% ▕████████████████▏   91 B
pulling 42ba7f8a01dd... 100% ▕████████████████▏  557 B
verifying sha256 digest
writing manifest
removing any unused layers
success
List downloaded models:
$ ollama list
NAME                	ID          	SIZE  	MODIFIED
llama2:latest       	78e26419b446	3.8 GB	4 seconds ago
Run model:
$ ollama run llama2
>>> Tell me some fun facts about llamas.
Llamas have unique markings on their faces that are similar to human fingerprints and can be used for identification purposes just like a human's fingerprint. Llamas also have very long lifespans, with individuals living up to 20-25 years in captivity and even longer in the wild.
Ollama Python Library
Install using pip.
pip3 install ollamaCreate a simple script.
import ollama

#ollama.pull("llama2")

response = ollama.chat(model="llama2", messages=[
  {
    "role": "user",
    "content": "Tell me a joke"
  }
])

print(response["message"]["content"])
Results:
Why did the chicken cross the road? To prove that he was not a chicken!More information on how to use the Ollama Python API can be found on the ollama-python github page . The Ollama Python API is built around the Ollama REST API.
This is perfect for integrating Ollama in your own projects!
Open WebUI
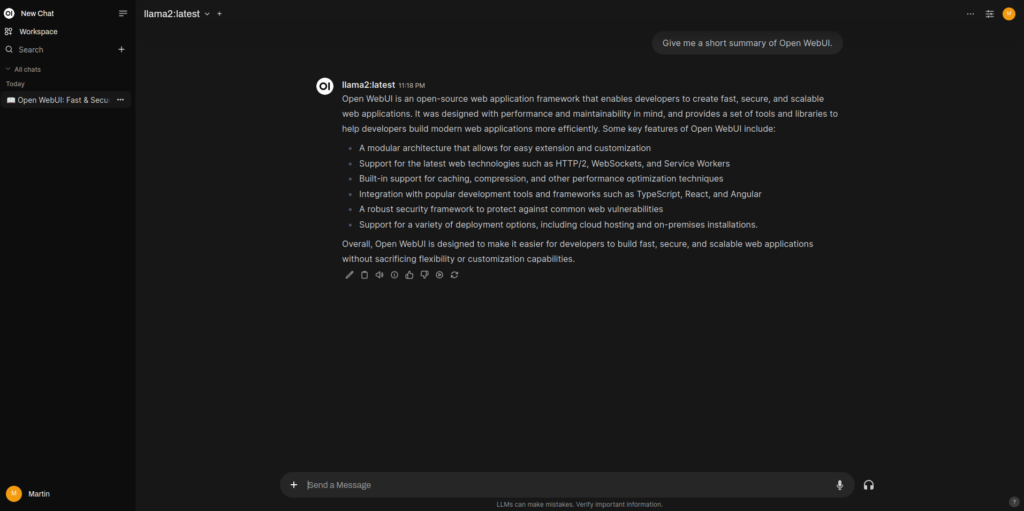
One of the cool community integrations of Ollama is Open WebUI. It is a user-friendly, self-hosted AI interface that operates entirely offline in your browser.
Open WebUI can be installed by choosing one of the installation methods described in its installation guide. The recommended way is to run Open WebUI inside a Docker container, so you will need Docker Engine installed. See the manual for Docker Engine on how to install it.
After Open WebUI has been installed, you can open your browser and visit localhost:3000 or localhost:8080 depending on your installation. You will then be prompted to create a local account, the first account that is created will automatically become an admin account. After that you can log in and start to interact with your models inside a good looking UI!

Apart from this, Open WebUI has alot more features to offer, including community made models, tools, etc.

